
Last Updated on October 18, 2026
A correctly applied driveway sealer helps protect asphalt against oxidation, moisture, and everyday surface wear. It also restores the dark, uniform appearance that makes a driveway look clean and well-maintained.
However, even the best sealer won’t perform properly if you apply it over dirt, standing water, oil stains, or damaged pavement.
In this guide, you’ll learn how to apply driveway sealer in 10 easy steps, from gathering tools and cleaning the surface to applying the final coat and allowing proper drying time. We’ll also explain the most common mistakes to avoid so you can get better results from your DIY project.
Keep in mind that sealing is not a replacement for regular maintenance. A well-maintained asphalt driveway may last 20–30 years or longer under favorable conditions, but the protective sealcoat itself usually needs renewal much sooner.
How to Apply Driveway Sealer: 10 Easy Steps
Learning how to apply driveway sealer isn’t particularly difficult, but preparation is essential. Cleaning, crack repairs, and drying can take longer than applying the coating itself.
For a typical residential driveway, it’s best to plan enough time for preparation and choose a period of suitable weather. The actual sealing process may take a few hours, while drying can require one or more days.
Step 1: Gather the Right Materials
Before starting, make sure you have the tools and materials required for your particular sealer.
- Asphalt driveway sealer
- Heavy-duty gloves and safety glasses
- Stiff-bristled push broom
- Garden hose or pressure washer
- Asphalt-safe driveway cleaner
- Crack filler and patching compound
- Oil stain remover and compatible primer, if required
- Driveway sealing squeegee or roller
- Application brush for edges
- Mixing paddle or suitable stirring tool
- Painter’s tape or protective plastic sheeting
- Cones or barriers to block traffic
Choose tools recommended by the sealer manufacturer. For example, Latex-ite recommends squeegees for several of its driveway sealers, while its Acrylic Grade product requires a roller.
Tip: Measure the driveway before buying sealer. Multiply the length by the width to calculate the approximate square footage, then check the container’s coverage rate.
Step 2: Inspect and Repair Cracks and Potholes
Walk over your driveway and inspect the entire surface for cracks, holes, crumbling edges, and uneven areas.
Driveway sealers are not designed to repair structural damage or fill large gaps. Applying a thin coating over damaged asphalt only hides the problem temporarily.
Use a suitable asphalt crack filler for minor cracks and an appropriate patching compound for potholes or depressed areas.
Follow the repair product’s curing instructions before applying the sealer. Some crack fillers and patches need at least 24 hours, while others require longer.
Step 3: Check the Weather Forecast
Weather is one of the most important factors in driveway sealing.
Many asphalt-emulsion sealers require both the air and pavement temperatures to be at least 50°F (10°C) and rising. Some consumer products require temperatures above 55°F (13°C).
Make sure temperatures will remain suitable during the required drying period.
Avoid sealing when:
- Rain or fog is expected during the required curing window.
- The pavement is wet or damp.
- Overnight temperatures may fall below the product’s minimum.
- Humidity is so high that proper drying is unlikely.
- The pavement is excessively hot.
Some sealers require at least 24 hours without rain, while others recommend 48 hours. Always follow the requirements on the product label.
For seasonal advice, see our guide on choosing the best weather for driveway sealing.
Step 4: Clean the Driveway Thoroughly
Once you’ve confirmed suitable weather, begin preparing the surface.
Remove leaves, loose gravel, soil, grass, and other debris using a push broom or leaf blower. Pay special attention to corners, edges, and cracks where dirt tends to accumulate.
If moss or vegetation is present, remove it before cleaning. Our article on getting rid of moss on asphalt covers this problem in more detail.
Next, use a driveway-safe cleaner and scrub any areas with noticeable grime.
A pressure washer can make cleaning easier, but avoid using excessive pressure or a concentrated nozzle that could damage older asphalt.
Tip: Don’t overlook the driveway edges. Loose dirt along the borders can prevent the sealer from bonding evenly.
Step 5: Rinse and Allow the Surface to Dry
After scrubbing, rinse away the remaining detergent, dirt, and loose debris using a garden hose or suitable pressure washer.
Push away standing water with a broom or squeegee. Then allow the driveway to dry completely.
Depending on sunlight, humidity, temperature, and surface condition, drying after washing may take approximately 24–48 hours.
Don’t apply sealer just because the top surface looks dry. Shaded areas and cracks may still contain moisture.
For a more detailed preparation process, read our driveway cleaning and preparation guide.
Step 6: Remove Oil and Grease Stains
Oil, gasoline, and grease stains can interfere with the adhesion of asphalt sealcoat. That’s why you should treat these areas before applying the protective coating.
For fresh oil spills, begin by absorbing the loose oil using cat litter or a suitable commercial absorbent.
For older stains, use a cleaner specifically designed for asphalt. Scrub the affected area, remove the oily residue, and allow it to dry.
If stubborn contamination remains, your sealer manufacturer may recommend a compatible oil-spot primer.
How to apply an oil-spot primer:
- Clean the stain as thoroughly as possible.
- Allow the area to dry according to the primer instructions.
- Apply the recommended amount using a brush or other approved tool.
- Wait for the specified drying period before sealing.
Not every primer needs two coats. Follow the product instructions rather than automatically applying extra material.
Our guide on removing oil stains from a driveway explains several cleaning methods.
Step 7: Mix and Prepare the Driveway Sealer
Before opening the container, inspect the label for mixing and dilution instructions.
Many residential asphalt sealers are ready to use and only require stirring until the material has a uniform consistency.
Some professional products have different mixing requirements, including approved additives or controlled dilution.
Follow these steps:
- Place the sealer bucket on a stable, level surface.
- Open the container carefully.
- Stir the contents using a suitable mixing tool.
- Continue until the material looks smooth and consistent.
- Keep the container closed when not actively using the product.
Important: Never add water or solvent unless the manufacturer specifically allows it. Over-dilution can reduce coverage, appearance, and durability.
Step 8: Protect the Edges and Stage Your Buckets
Before full application, protect the areas you don’t want to coat.
Use painter’s tape or protective sheeting around garage doors, sidewalks, concrete borders, walls, and other nearby surfaces.
Next, position unopened sealer buckets in convenient locations outside the application path. This reduces unnecessary walking and makes it easier to continue working without interruption.
Use a small brush or suitable applicator to seal along the driveway edges first.
Apply a controlled, thin layer. Avoid building up a thick coating around borders, as excess sealer may take longer to dry or create uneven results.
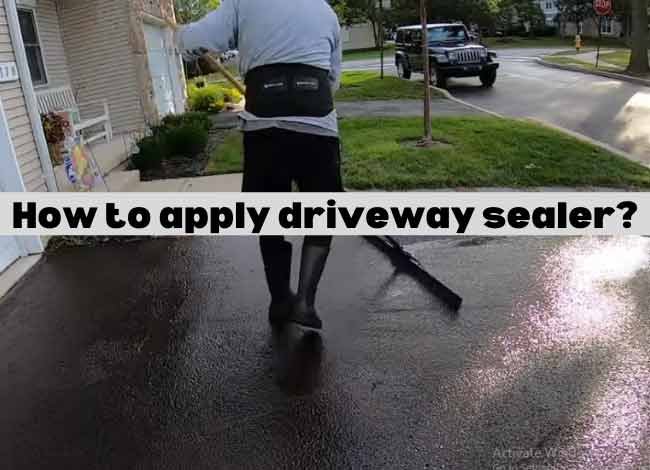
Step 9: Apply the Driveway Sealer Evenly
Now it’s time to apply the main coat.
Start at the far end of the driveway and work toward the exit so you won’t have to walk across freshly sealed asphalt.
Depending on your sealer, use a squeegee, roller, or approved application equipment.
Application steps:
- Pour a manageable ribbon of sealer across a section of the driveway.
- Spread it evenly using the recommended tool.
- Maintain a wet edge to reduce visible streaks.
- Work in overlapping passes without leaving puddles.
- Apply steady pressure to create a thin, uniform coat.
- Continue toward the driveway entrance until the entire area is covered.
For many squeegee-applied sealers, pulling the squeegee across the surface with consistent pressure produces a better result than leaving excess material behind.
Don’t assume that applying a thicker layer provides stronger protection. Excess coating may dry slowly, remain tacky, or wear unevenly.
Should You Apply a Second Coat?
Many asphalt driveway sealers recommend two thin coats for better coverage, but the exact requirement depends on the product.
For example, some SealMaster products allow recoating after approximately 2–4 hours when the first coat has dried sufficiently.
Other products, including certain Latex-ite sealers, require a much longer waiting period before applying the second coat.
Always follow your particular sealer’s recoat instructions.
For products requiring two coats, applying the second coat in a different direction may help achieve more uniform coverage if permitted by the manufacturer.
Step 10: Allow the Driveway Sealer to Cure
After applying the final coat, block the driveway entrance with cones, empty buckets, or suitable barriers.
Even if the surface feels dry, it may not be ready for vehicle traffic.
Many asphalt driveway sealers require a minimum of 24 hours before vehicles return. Some consumer products recommend waiting 24–48 hours, while cool or humid weather may extend the drying period.
| Condition | What to Expect |
|---|---|
| Warm, Dry Weather | Drying is generally faster when temperatures meet product requirements. |
| Cool Weather | Curing may take longer, and sealing should be postponed if temperatures are below the allowed range. |
| High Humidity | Moisture evaporates more slowly, extending the curing period. |
| Vehicle Traffic | Commonly at least 24–48 hours, depending on the product. |
Do not drive or park on the surface until the manufacturer’s recommended curing period has passed.
For more information, read our article explaining how long asphalt driveway sealer needs to dry.
How Much Driveway Sealer Do You Need?
Before purchasing, calculate your driveway area. This helps prevent running out of sealer halfway through the job.
Use this simple formula:
Driveway Length × Driveway Width = Total Square Feet
For example, a driveway measuring 40 feet long and 20 feet wide covers 800 square feet.
If the selected product covers 350 square feet per five-gallon bucket for one coat, the job would require approximately three buckets for one coat, allowing for the need to round up.
For two coats, calculate the total material according to the manufacturer’s coverage recommendations rather than assuming every product uses the same amount.
Coverage depends on asphalt age, texture, porosity, and application thickness. Older, rougher pavement may absorb more sealer.
Common Mistakes to Avoid When Applying Driveway Sealer
Even a small mistake can shorten the life of a driveway sealcoat. Here are the most common problems to avoid.
Applying Sealer Over Dirty Asphalt
Dirt, oil, moss, and loose debris can interfere with adhesion. Always clean the surface and allow it to dry before sealing.
Using Sealer to Fill Cracks
Sealcoat is a thin surface treatment, not a crack repair compound. Repair cracks and potholes with appropriate asphalt materials before applying the coating.
Applying Too Thick a Coat
Thick layers may trap moisture, dry unevenly, and remain soft longer than expected. Follow the coverage rate on the label.
Ignoring the Weather
Rain, cold temperatures, fog, and excessive humidity can interrupt curing. Check the forecast before opening the first bucket.
Using the Wrong Tools
Some driveway sealers are designed for squeegee application, while others require a roller. Follow the manufacturer’s recommendations for the best results.
Allowing Cars Back Too Early
Premature traffic can leave tire marks, scuffs, or damaged areas. Wait until the required curing time has passed.
Sealing New Asphalt Too Soon
Newly installed asphalt needs sufficient curing and weathering before most sealcoating products can be used.
Some products allow application after a minimum of four weeks under ideal conditions, but many residential paving contractors recommend waiting longer. Always follow the paving contractor’s and sealer manufacturer’s instructions.
Can You Apply Asphalt Sealer to a Concrete Driveway?
No. Asphalt sealcoat and concrete sealer are designed for different materials.
Asphalt sealers are formulated to protect blacktop pavement, while concrete sealers may penetrate concrete pores or form a protective surface film.
Using the wrong product can lead to poor adhesion, unwanted appearance changes, and premature failure.
If your driveway is concrete, choose a suitable product from our concrete sealer buying guide instead.
How Often Should You Reapply Driveway Sealer?
Most residential asphalt driveways do not need sealing every year.
A common maintenance interval is approximately every two to three years, although the actual timing depends on weather, pavement condition, vehicle traffic, and the quality of the previous application.
Look for noticeable fading, reduced protective coverage, and general surface wear before deciding to reseal.
Applying new sealcoat too often can create unnecessary buildup and may cause adhesion or appearance problems.
Tips for Maintaining a Newly Sealed Driveway
After the sealer has fully cured, routine maintenance will help preserve its appearance.
- Clean Regularly: Remove dirt, leaves, and debris using a broom or leaf blower.
- Fix Vehicle Leaks: Oil and gasoline can damage asphalt and stain the sealcoat.
- Avoid Sharp Turns: Turning tires while the vehicle is stationary can leave marks, especially on newly sealed pavement.
- Repair Cracks Promptly: Prevent small problems from getting worse.
- Inspect After Winter: Look for cracks, worn areas, and drainage problems.
- Reseal When Needed: Follow the product’s maintenance recommendations instead of applying a new coat every year.
Frequently Asked Questions About Applying Driveway Sealer
1. What is the best way to apply driveway sealer?
For many residential asphalt sealers, a driveway squeegee provides even coverage. Some products require a roller instead. Always use the application tool recommended on the container.
2. How long does driveway sealer take to dry?
Many products require at least 24 hours before vehicle traffic, while others recommend 24–48 hours or longer. Cool temperatures and high humidity may extend the curing time.
3. Do I need two coats of driveway sealer?
Many asphalt sealers recommend two thin coats, but some allow a single coat depending on the product and surface. Follow the manufacturer’s specific application instructions.
4. Can I apply driveway sealer over cracks?
Minor cracks and potholes should be repaired before sealing. Standard sealcoat is not designed to replace a proper asphalt crack filler or patching compound.
5. What temperature is best for applying driveway sealer?
Many asphalt sealers require at least 50°F, while some require 55°F or higher. Both air and pavement temperatures matter, and the weather must remain suitable during curing.
6. Can I walk on the driveway before it’s ready for cars?
Some sealers allow light foot traffic earlier than vehicle traffic. However, you should follow the exact instructions on your product rather than assuming the surface is safe because it looks dry.
Bottom Line: How to Apply Driveway Sealer Properly
Now that you know how to apply driveway sealer, the most important thing is to avoid rushing the job.
Start by choosing a quality asphalt sealer, checking the weather, cleaning the surface, and repairing any cracks or potholes. Then apply thin, even coats using the correct tools and allow the recommended curing time.
A properly sealed driveway can look cleaner, resist certain types of weather damage, and remain easier to maintain. With regular cleaning and timely repairs, sealcoating can be a useful part of keeping your asphalt driveway in good condition for years to come.