
Last Updated on October 18, 2026
Accidental overspray of driveway sealer on your vinyl siding can make your home’s exterior look messy and unattractive. Whether you’re sealing a driveway yourself or hiring a contractor, a few splashes of black asphalt sealer can easily end up on the lower siding panels.
Fresh sealer may be relatively easy to remove, but once it dries, it can stick firmly to the vinyl surface. Using the wrong cleaning product can make matters worse by scratching, discoloring, or permanently damaging the siding.
If you’re wondering how to remove driveway sealer from vinyl siding, the safest approach is to begin with mild soap and water, then consider a compatible specialty cleaner if the stain remains.
This guide explains how to handle fresh and dried driveway sealer, whether kerosene or WD-40 is a good option, and which cleaning products you should avoid.
How to Remove Driveway Sealer from Vinyl Siding: Start Here
Before using any cleaning product, identify the type of sealer that caused the stain.
Most residential asphalt driveway sealcoats are water-based emulsions, but some products contain different solvents or additives. Concrete sealers may be acrylic, water-based, or solvent-based.
The sealer’s composition and how long it has been on the siding affect which removal method will work.
For fresh stains: Start with water, a mild detergent, and a soft cloth.
For dried stains: Remove loose residue gently and contact the siding manufacturer about a suitable cleaner if regular washing fails.
For stubborn tar-like marks: A specialty tar remover may help, but only if its manufacturer specifically confirms compatibility with your vinyl siding.
Method 1: Remove Fresh Driveway Sealer with Soap and Water
If the sealer has only recently splashed onto your siding, this should be your first cleaning method.
CertainTeed recommends mild soapy water, a soft brush, and gentle rinsing for routine vinyl siding cleaning.
What You’ll Need
- Warm or lukewarm water
- Mild liquid dish soap
- Soft microfiber cloth
- Soft-bristle brush or sponge
- Bucket
- Garden hose with gentle water flow
Steps to Follow
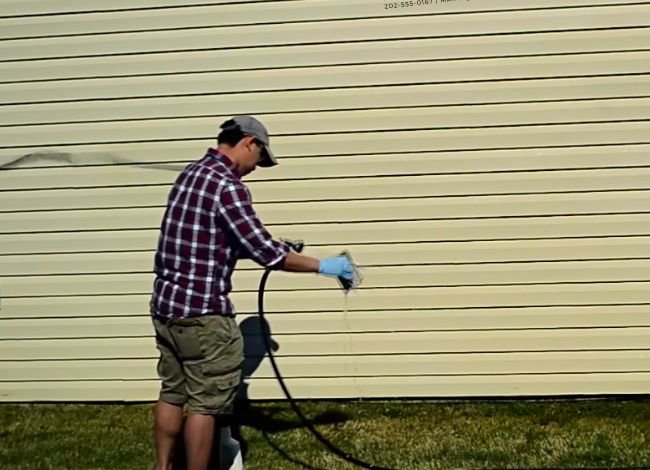
- Use a clean cloth to gently lift any wet sealer without spreading it across the siding.
- Add a small amount of mild dish soap to a bucket of lukewarm water.
- Dip a microfiber cloth or soft sponge into the solution.
- Gently wipe the affected area using light pressure.
- For marks that remain, use a soft-bristle brush without aggressive scrubbing.
- Rinse the area with clean water using a garden hose.
- Dry with a clean microfiber cloth and inspect the result.
Avoid using boiling water or high-pressure washing equipment. Excessive heat can deform vinyl, while pressure washing may force water behind the siding.
If a mark remains after a few gentle attempts, move to a more suitable treatment instead of scrubbing harder.
Method 2: Can You Use Kerosene to Remove Driveway Sealer?
Kerosene has traditionally been used to soften certain petroleum-based materials, including tar and asphalt residue.
However, kerosene should not be your first choice for vinyl siding.
Although it may loosen some oil-based sealers, kerosene can also affect plastic surfaces, discolor certain finishes, and leave oily residue. Its flammability creates additional risks during home cleaning.
The original recommendation to soak a sponge in kerosene and rub the vinyl siding is therefore not a suitable general cleaning method.
What Should You Do Instead?
- Find the name or brand of your vinyl siding if possible.
- Check the siding manufacturer’s cleaning and chemical compatibility instructions.
- Identify the driveway sealer used, including whether it is water-based or solvent-based.
- Ask the siding manufacturer or installer to recommend a compatible cleaner for the residue.
- Use the recommended cleaner only as directed, testing it on a hidden area first.
Do not use kerosene, mineral spirits, or paint thinner unless the siding manufacturer expressly approves the specific treatment.
Safety Note: Kerosene is combustible and can produce harmful vapors. Never use it near ignition sources, electrical equipment, or areas without suitable ventilation.
Method 3: Can WD-40 Remove Driveway Sealer from Vinyl Siding?
WD-40 Multi-Use Product is commonly used to loosen sticky residue and certain types of grime. Some homeowners also try it for asphalt or tar marks.
However, WD-40 contains petroleum-derived ingredients and is not universally approved for vinyl siding.
Using a large amount or leaving it on the siding for an extended period may affect certain finishes or leave a greasy mark.
Is WD-40 Worth Trying?
Only consider it when your siding manufacturer’s care instructions confirm that the particular product is compatible with the siding.
Don’t spray WD-40 directly onto a large section of your home as an experiment.
If the manufacturer confirms it is suitable, follow the approved application and contact-time instructions. Test a hidden section and clean away any remaining residue as directed.
If compatibility cannot be confirmed, use a vinyl-safe cleaning product instead.
Bottom Line: WD-40 may loosen some sticky substances, but that does not mean it is an appropriate or damage-free solution for every vinyl siding finish.
Oil-Based vs. Water-Based Asphalt Sealer Removal
Not all driveway sealers behave the same way. Knowing which product was spilled helps you select a cleaning method without unnecessarily exposing your siding to harsh chemicals.
Water-Based Asphalt Sealer
Most water-based asphalt emulsions are easier to clean before they cure.
For a fresh spill, mild soap and water may help lift the residue. Once the coating dries, it may become much more difficult to remove.
Don’t assume that water-based sealer can always be washed off after curing. Its binders form a protective film that may adhere strongly to the vinyl.
Oil-Based or Solvent-Based Sealer
Solvent-based residue can be particularly stubborn, but strong solvents can also damage vinyl siding.
Instead of automatically using kerosene or tar remover, consult the vinyl siding manufacturer’s cleaning guidance.
If a specialty cleaner is approved, follow the label instructions carefully.
| Sealer Type | First Cleaning Method | If the Stain Remains |
|---|---|---|
| Fresh Water-Based | Mild soap and water | Approved vinyl siding cleaner |
| Dried Water-Based | Gentle washing and removal of loose residue | Consult siding manufacturer |
| Oil-Based or Solvent-Based | Gentle cleaning without aggressive rubbing | Manufacturer-approved specialty treatment |
| Unknown Sealer | Mild soap and water | Identify the sealer before using stronger chemicals |
Regardless of the sealer type, finish by rinsing the cleaned area according to the siding manufacturer’s instructions.
How to Remove Dried Driveway Sealer from Vinyl Siding
Dried driveway sealer can be harder to remove than fresh overspray, especially when it has been exposed to sunlight for several days.
However, aggressive scraping can permanently scratch the siding.
Steps for Dried Sealer
- Inspect the stain and identify whether it is a thin splash or a thick, raised deposit.
- Wash the surrounding area with mild soap and water to remove loose dirt.
- If a thick piece of sealer is already loose, carefully lift it using a fingernail or a smooth plastic tool without scraping the vinyl surface.
- Do not force off material that remains firmly attached.
- Use a vinyl-compatible cleaner approved for this type of stain.
- Follow the cleaner’s instructions and rinse appropriately.
- Stop if the siding becomes dull, sticky, discolored, or scratched.
Avoid metal scrapers, wire brushes, abrasive pads, and sharp blades.
If the dried sealer covers a large area or is firmly bonded to the siding, professional cleaning or replacement of an individual siding panel may be more practical than repeated chemical treatments.
Can You Use a Citrus-Based Cleaner?
Some commercial citrus-based cleaners are marketed for removing adhesive, grease, and tar residue.
However, the word “citrus” does not automatically mean a product is safe for vinyl.
Some citrus cleaners contain concentrated solvents such as d-limonene, which may affect certain plastics, coatings, or finishes.
Before using one, confirm that both the cleaner and siding manufacturers approve the application.
If the product has not been tested for your particular siding, use mild soap and water or request a recommendation from your siding installer instead.
Be Careful When Removing Driveway Sealer from Vinyl Siding
What precautions should you take when removing driveway sealer from vinyl siding?
Cleaning chemicals can sometimes remove a stain while damaging the siding underneath. That’s why it is important to use the least aggressive effective method.
- Wear Protective Equipment: Use suitable gloves and safety glasses when handling cleaners. Follow the product’s Safety Data Sheet for any additional protection.
- Keep Children and Pets Away: Prevent contact with cleaning solutions and contaminated residue.
- Test Before Cleaning: Apply a small amount of an approved cleaner to a hidden spot and inspect the result.
- Avoid Excessive Scrubbing: Hard brushes and abrasive pads can scratch vinyl permanently.
- Protect Nearby Plants: Prevent chemical overspray and contaminated runoff.
- Use Gentle Water Pressure: High-pressure spraying can force water behind siding panels.
- Follow Contact Times: Never invent a universal 5-, 10-, or 30-minute limit for cleaning products. Use the manufacturer’s instructions.
Make sure any cleaning liquid is handled and disposed of appropriately rather than washing concentrated sealer residue into storm drains.
Harmful Chemicals to Avoid on Vinyl Siding
Unless specifically approved by the siding manufacturer, avoid using the following:
- Acetone and nail polish remover
- Lacquer thinner and paint strippers
- Gasoline and strong petroleum solvents
- Undiluted chlorine bleach
- Highly concentrated alkaline degreasers
- Abrasive cleaning powders
- Unverified tar or adhesive removers
These products can discolor the surface, damage its protective finish, or create additional safety hazards.
How to Prevent Driveway Sealer from Getting on Vinyl Siding
Preventing overspray is much easier than removing a stubborn stain afterward.
If you’re planning to seal your driveway, take a few minutes to protect the surrounding exterior surfaces.
1. Cover the Lower Siding Panels
Use protective plastic sheeting or painter’s masking film along the bottom of the wall next to the driveway.
Secure it without using adhesives that could damage the siding finish.
2. Use a Smaller Applicator Near Walls
A brush or appropriately sized roller gives you better control around garage walls and siding than a wide applicator.
Work slowly near borders and avoid splashing excess sealer.
3. Avoid Spraying in Windy Conditions
If your sealer is approved for spray application, avoid working when wind can carry droplets toward the house.
Follow the manufacturer’s equipment and spray-control instructions.
4. Clean Accidental Splashes Immediately
Keep a bucket of clean water and suitable soft cloths nearby. When compatible with the sealer and siding, removing a fresh splash is usually easier than treating dried residue.
For preparation tips, see our step-by-step driveway sealer application guide.
When Should You Call a Professional?
Some driveway sealer stains are difficult to remove without damaging the vinyl surface.
Professional help may be appropriate when:
- The sealer has been on the siding for several weeks or months.
- A large section of the exterior wall is stained.
- Previous cleaning attempts caused dullness or discoloration.
- The siding has a special texture, color, or protective coating.
- The siding manufacturer cannot recommend a safe DIY treatment.
For extensive overspray, ask a professional siding cleaner or installer whether cleaning or replacing the affected panels offers a better result.
Frequently Asked Questions About Driveway Sealer on Vinyl Siding
1. What is the safest way to remove driveway sealer from vinyl siding?
Start with mild dish soap, lukewarm water, and a soft microfiber cloth. If that doesn’t work, contact the siding manufacturer for a compatible cleaning product instead of using strong solvents.
2. Can kerosene remove asphalt sealer from vinyl siding?
Kerosene may loosen some asphalt-based residues, but it can damage certain vinyl finishes and creates a fire risk. Do not use it unless the siding manufacturer specifically approves the treatment.
3. Does WD-40 damage vinyl siding?
Compatibility depends on the siding material, finish, and the exact WD-40 product. Because it is not universally approved for vinyl siding, test or use it only with manufacturer confirmation.
4. How do you remove dried asphalt sealer from vinyl siding?
Begin with mild cleaning and gently remove only loose residue. For firmly attached deposits, use a siding-compatible specialty cleaner recommended by the manufacturer. Avoid metal scrapers and strong solvents.
5. Can a pressure washer remove driveway sealer from siding?
Pressure washing isn’t recommended as a default solution. High-pressure water can damage vinyl siding or force moisture behind the panels. Use gentle washing methods instead.
6. Will driveway sealer permanently stain vinyl siding?
Some stains can be removed, especially when treated early. However, dried residue or solvent-related discoloration may be permanent. In severe cases, replacing the affected siding panels may be necessary.
Final Thoughts: How to Remove Driveway Sealer from Vinyl Siding
Removing driveway sealer from vinyl siding is possible in many cases, but the safest method depends on the sealer and siding materials.
For fresh overspray, mild soap and water should be your starting point. For older or more stubborn stains, avoid automatically reaching for kerosene, WD-40, or aggressive tar removers.
Instead, identify the sealer, check the siding manufacturer’s cleaning guidance, and test any approved cleaner before treating a visible area.
Now that you know how to remove driveway sealer from vinyl siding, the most important advice is simple: work gently, clean spills as soon as possible, and stop if the vinyl starts showing signs of damage.
If you are preparing for another sealing project, see our guide on cleaning and preparing a driveway before sealing. Proper preparation and careful application can help prevent accidental overspray.