
Last Updated on April 21, 2025
Applying a driveway sealer to your concrete or asphalt surface offers numerous benefits. It helps resist oil spills, gas leaks, and water penetration, and it protects against damage from UV rays and air exposure. That’s why regular sealing is essential for maintaining the longevity and appearance of your driveway.
However, many homeowners make mistakes during the sealing process—one of the most common being walking or driving on the driveway before the sealer has dried properly. The drying time for a driveway sealer depends on several factors, including weather, surface type, and environmental exposure.
How Long Does a Driveway Sealer Take to Dry?
If applied during the summer months, the sealer typically dries faster due to warm temperatures and direct sunlight. On a hot, sunny day, and if your driveway is fully exposed without shade from trees or buildings, it can dry to the touch within 24 hours. In such conditions, light foot traffic is generally safe after one full day, but it’s best to wait 48 hours before driving on the surface.
On the other hand, cool, humid, or overcast weather can delay drying. If your driveway is shaded or enclosed between buildings or trees, expect a slower curing process. In these conditions, wait at least 48 hours before walking on the driveway and up to 72 hours before allowing vehicle traffic.
It’s also important to note that while the surface may appear dry in a day or two, complete curing takes around 30 days. During this curing period, avoid oil spills, harsh chemical exposure, or turning your car’s tires while stationary, as this can cause permanent marks or damage.
✅ Quick Tip: Avoid applying the sealer if rain is expected within 24 hours. Moisture can wash away the sealer before it cures.
What’s the Best Time of Day to Seal a Driveway?
Knowing the right time of day to apply a driveway sealer is just as important as knowing the drying time. Here are some helpful guidelines:
For Homeowners:
Choose a time when the driveway will be free of traffic. If your car is parked in the garage, make sure you won’t need to use it for at least 48–72 hours. Apply the sealer during a time of day when temperatures are between 50°F and 90°F (10°C to 32°C) and the surface is not too hot to touch. Early morning or late afternoon often works best.
For Business Owners:
Since business operations usually run during the day, it’s ideal to seal driveways or parking lots at night or on weekends when traffic is minimal. Many commercial properties opt to section off portions of their lot to seal one part at a time without interrupting operations.
What’s the Procedure for Preparing the Application of Driveway Sealer?
Proper preparation is essential for achieving long-lasting protection and a smooth finish when applying a driveway sealer. Follow these step-by-step guidelines to ensure the best results:
Step 1: Thoroughly Clean the Driveway
Start by cleaning your driveway to ensure a proper inspection and successful application. Use a stiff-bristled push broom to sweep away leaves, loose dirt, and debris. Then, use a garden hose or a pressure washer to rinse off sand, grit, and embedded dirt.
✅ Tip: If your driveway has oil stains or is heavily soiled, apply a concentrated asphalt cleaner for deep cleaning.
Step 2: Inspect the Driveway for Damage
Before sealing, it’s crucial to examine the entire driveway. Look for small cracks, potholes, or surface wear. This inspection helps identify areas that require repair.
⚠️ Important: A driveway sealer is not meant to fill large cracks or holes. Those must be repaired separately.
Step 3: Fill Cracks and Holes
If you notice any cracks or holes during the inspection, use an asphalt crack filler or patching compound before sealing. Seal these imperfections thoroughly to prevent future damage.
🛠️ Note: Applying sealer over unfilled cracks can lead to premature failure and recurring issues.
Step 4: Let the Surface Dry Completely
Once cleaned and patched, allow the driveway to dry fully. Moisture can interfere with the bonding and effectiveness of the sealer. Pay special attention to shaded areas, as they take longer to dry.
☀️ Pro Tip: Sealing a dry surface ensures better adhesion and a more even finish.
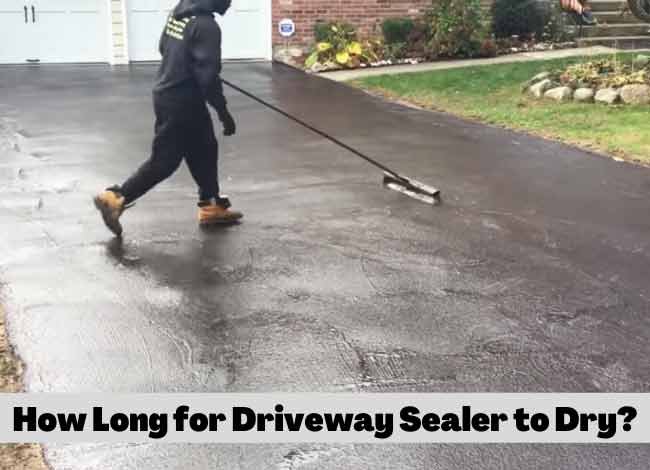
Step 5: Apply the Driveway Sealer
Now it’s time to apply your preferred driveway sealer. Use a squeegee or roller to apply an even coat, starting from one end and working your way across. Make sure you follow the manufacturer’s instructions for the best coverage.
🎯 Reminder: Regular sealing helps protect your asphalt surface from UV rays, water damage, oil stains, and oxidation. It also enhances the curb appeal of your property.
Final Thoughts
A freshly sealed driveway needs time to cure. In warm and sunny weather, the sealer typically dries within 24 hours. However, in cooler, damp, or humid conditions, drying may take up to 48 hours—or even longer.
🚫 Avoid walking or driving on the sealed surface during this period to prevent smudging or damage.
🌞 Best Time to Seal: Summer is the ideal season for sealing driveways, as the heat speeds up the drying process. If sealing in late fall or during cooler months, plan for a curing time of at least 72 hours.
By following these steps, you’ll enhance both the durability and visual appeal of your asphalt driveway. Proper maintenance with a quality driveway sealer ensures lasting protection against the elements and everyday wear.